Did you get the ‘Update time zones’ message on your PC? If you get this message on your PC screen, then that indicates that the time zones on your PC have been updated.
But that doesn’t happen without any reason. If you have been wondering why were your timezone definitions updated?
If you have thought of the same, this article should help you. In this article, we will discuss why were your Timezone definitions updated.
Why Were Your Timezone Definitions Updated?
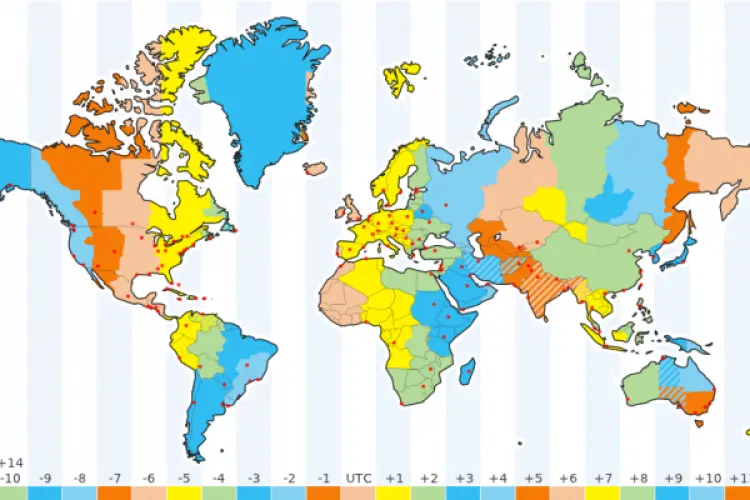
The Timezone definition must be updated to keep up with the legislative changes. They are updated to keep up with changes made by the political bodies to daylight-saving rules, UTC offsets, and time zone boundaries.
If any changes are made, your Timezone Definitions will be automatically updated. The changes will take place after you restart your system. After the restart, the timezone definitions will be changed to the most recent update available.
How To Check Timezone On PC?
If the Timezone definition is updated on your PC, and you want to check them or if you want to update them manually, then you can follow the steps given below-
On Windows 10/11
If you are using Windows 10 or Windows 11, then you can check and change the timezone by following the steps given below-
- Open the Start Menu by clicking on the Start icon.
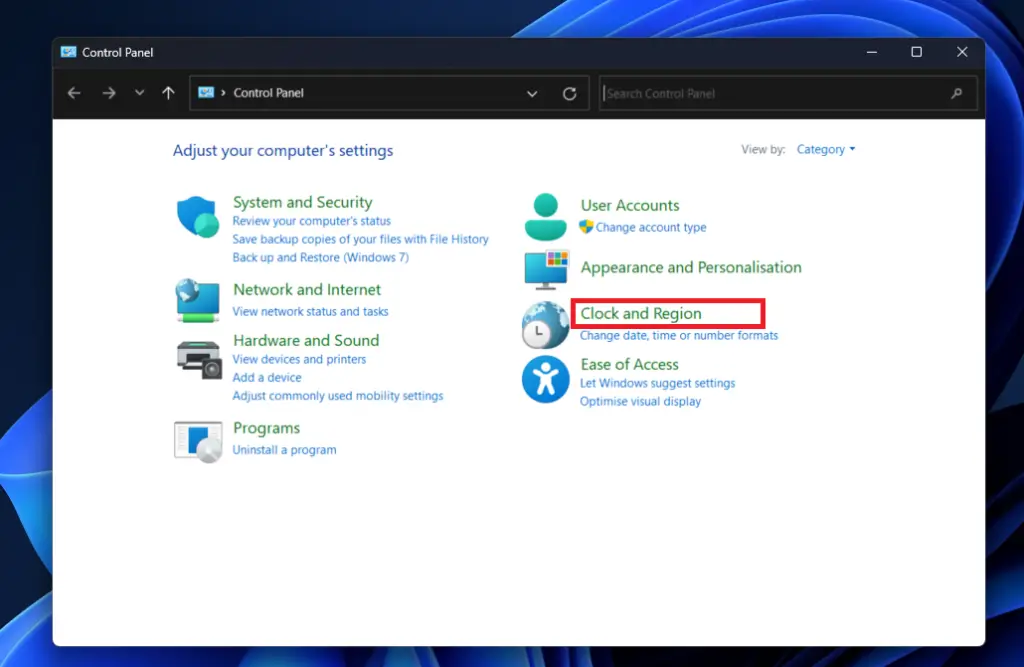
- Now, type Control Panel and press Enter to open Control Panel.
- Here, click on the Clock and Region option.
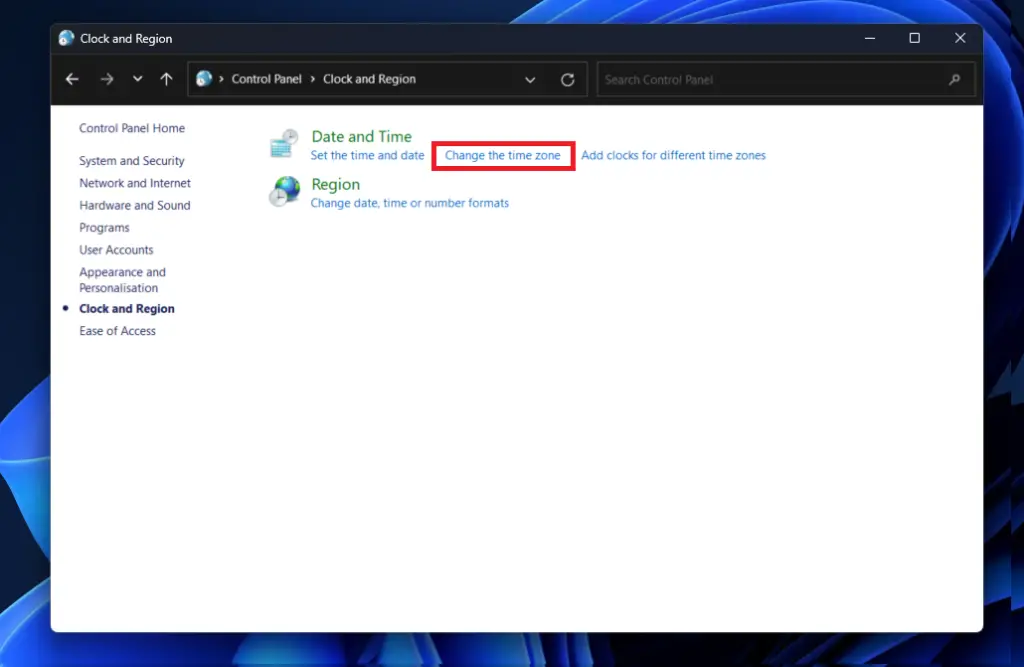
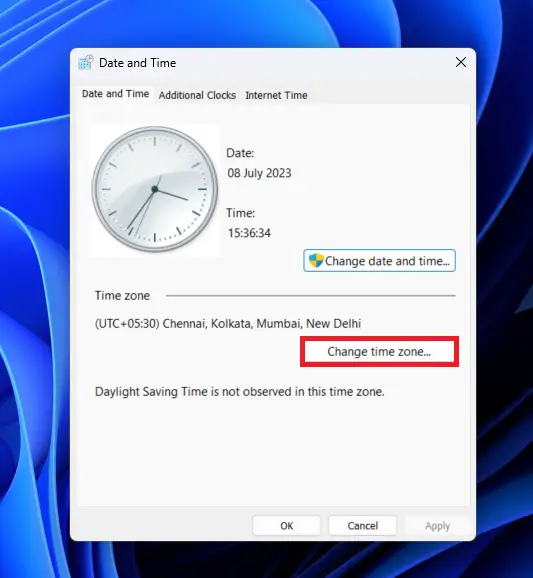
- Under the Date and Time section, click the Change the time zone option.
- You will see the timezone under the Time Zone section.
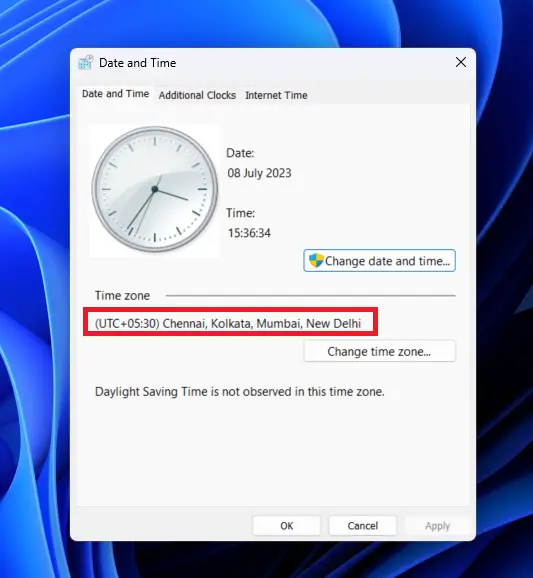
- If you want to change the timezone, click the Change Time Zone button. Before changing the time zone, ensure you are connected to the internet on your PC.
- Click on the drop-down menu under the Time Zone and select the time zone for your region. After choosing the time zone, click on OK.
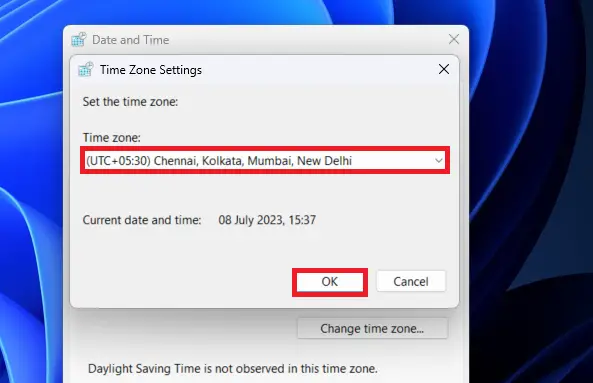
- Finally, click on Apply and then on the OK button.
On macOS
If you are using a Macbook, iMac, or any other Mac device and you want to check and change the timezone on it, then you can follow the steps given below to do so-
- Click on the Apple icon at the top left corner and then click on System Preferences.
- Now, click on Date & Time and then on Time Zone.
- You will see the timezone set on your Mac here.
- Select the option saying Set a time zone automatically using the current location. This will automatically set the correct timezone based on your site, but you must be connected to the internet.
- Once done, your timezone will be automatically changed to the correct location.
On Ubuntu (Linux)
If you are using Ubuntu on your system and you want to check the timezone changes made or want to change the timezone on it, then you will be able to do it through the steps given below-
- Click on the Battery or Sound icon at the taskbar at the top.
- From the menu that opens after clicking the icon, and then click on Settings.
- You can turn on the toggle for Automatic Time Zone to set the timezone automatically. If you turn it off but want to set up the time zone manually, then you can follow the steps given below-
- Click on the Time Zone option.
- From the map of the world, select the location to set the time zone or search for your region.
- Once done, click the Close (x) button at the top right corner to close the window.
Final Words
We hope we have made it clear why your timezone definitions were updated. We have also discussed how you can check the timezone and update them on Windows, Mac, and Ubuntu.